
If you own a website of any kind, rather for business or just a personal blog, you probably have heard about WordPress. One of every three websites you visit is run by WordPress. There are also plugins for you to improve your website. WP Rocket is one of them. It helps you to get a faster website to put it simply. Before we go any further let’s talk about WordPress and its plugins for a little.
What Is WordPress and Its Plugins?
WordPress is an open-source content management system that helps you create and build your website. It is the most popular way for a series of reasons. First of all, it is easy to use so everyone can benefit from it. Another good side that it’s very flexible. By flexible we mean that you can arrange and adjust almost everything without needing to know about programming. Talking about WordPress, maybe you have come across WordPress.org and WordPress.com. There is a small but distinctive difference between these two. WordPress.org is the free, self-hosted way of building any kind of webpage. WordPress.com is a paid service with less flexibility to offer. To sum up, you can use WordPress for your business websites, online stores, blogs, and almost any other kind you can think about.
Come to talk about its plugins, WordPress is not enough after you set your website up. There are many plugins available to improve your website. For example, let’s talk about WP Rocket.
WP Rocket
WP Rocket is a WordPress caching plugin available to improve your website’s load time. It helps your visitors load the site in the fastest way possible which decreases the chance of them leaving the site while just waiting for it to load. It’s really helpful and works efficiently. But how does it exactly work? Fundamentally this plugin deletes caches on a regular basis so the load time doesn’t lag. Browser caching, page caching, mobile cache files, and preloading the cache and all that makes the website load slower regardless of how fast your internet is. Not only a slow loading WordPress site is a reason for potential visitors to leave but also search engines like Google doesn’t like slow websites. The faster websites have a priority in search rankings, which means when your site is faster, you´ll appear before the slower ones.

How to Install and Configure WP Rocket?
After figuring out what is WP Rocket good for, let’s see how it is installed and a basic configuration.
The automatic installation is pretty easy:
- First of all, you need to buy WP Rocket from WordPress or directly from its website and download the zip file.
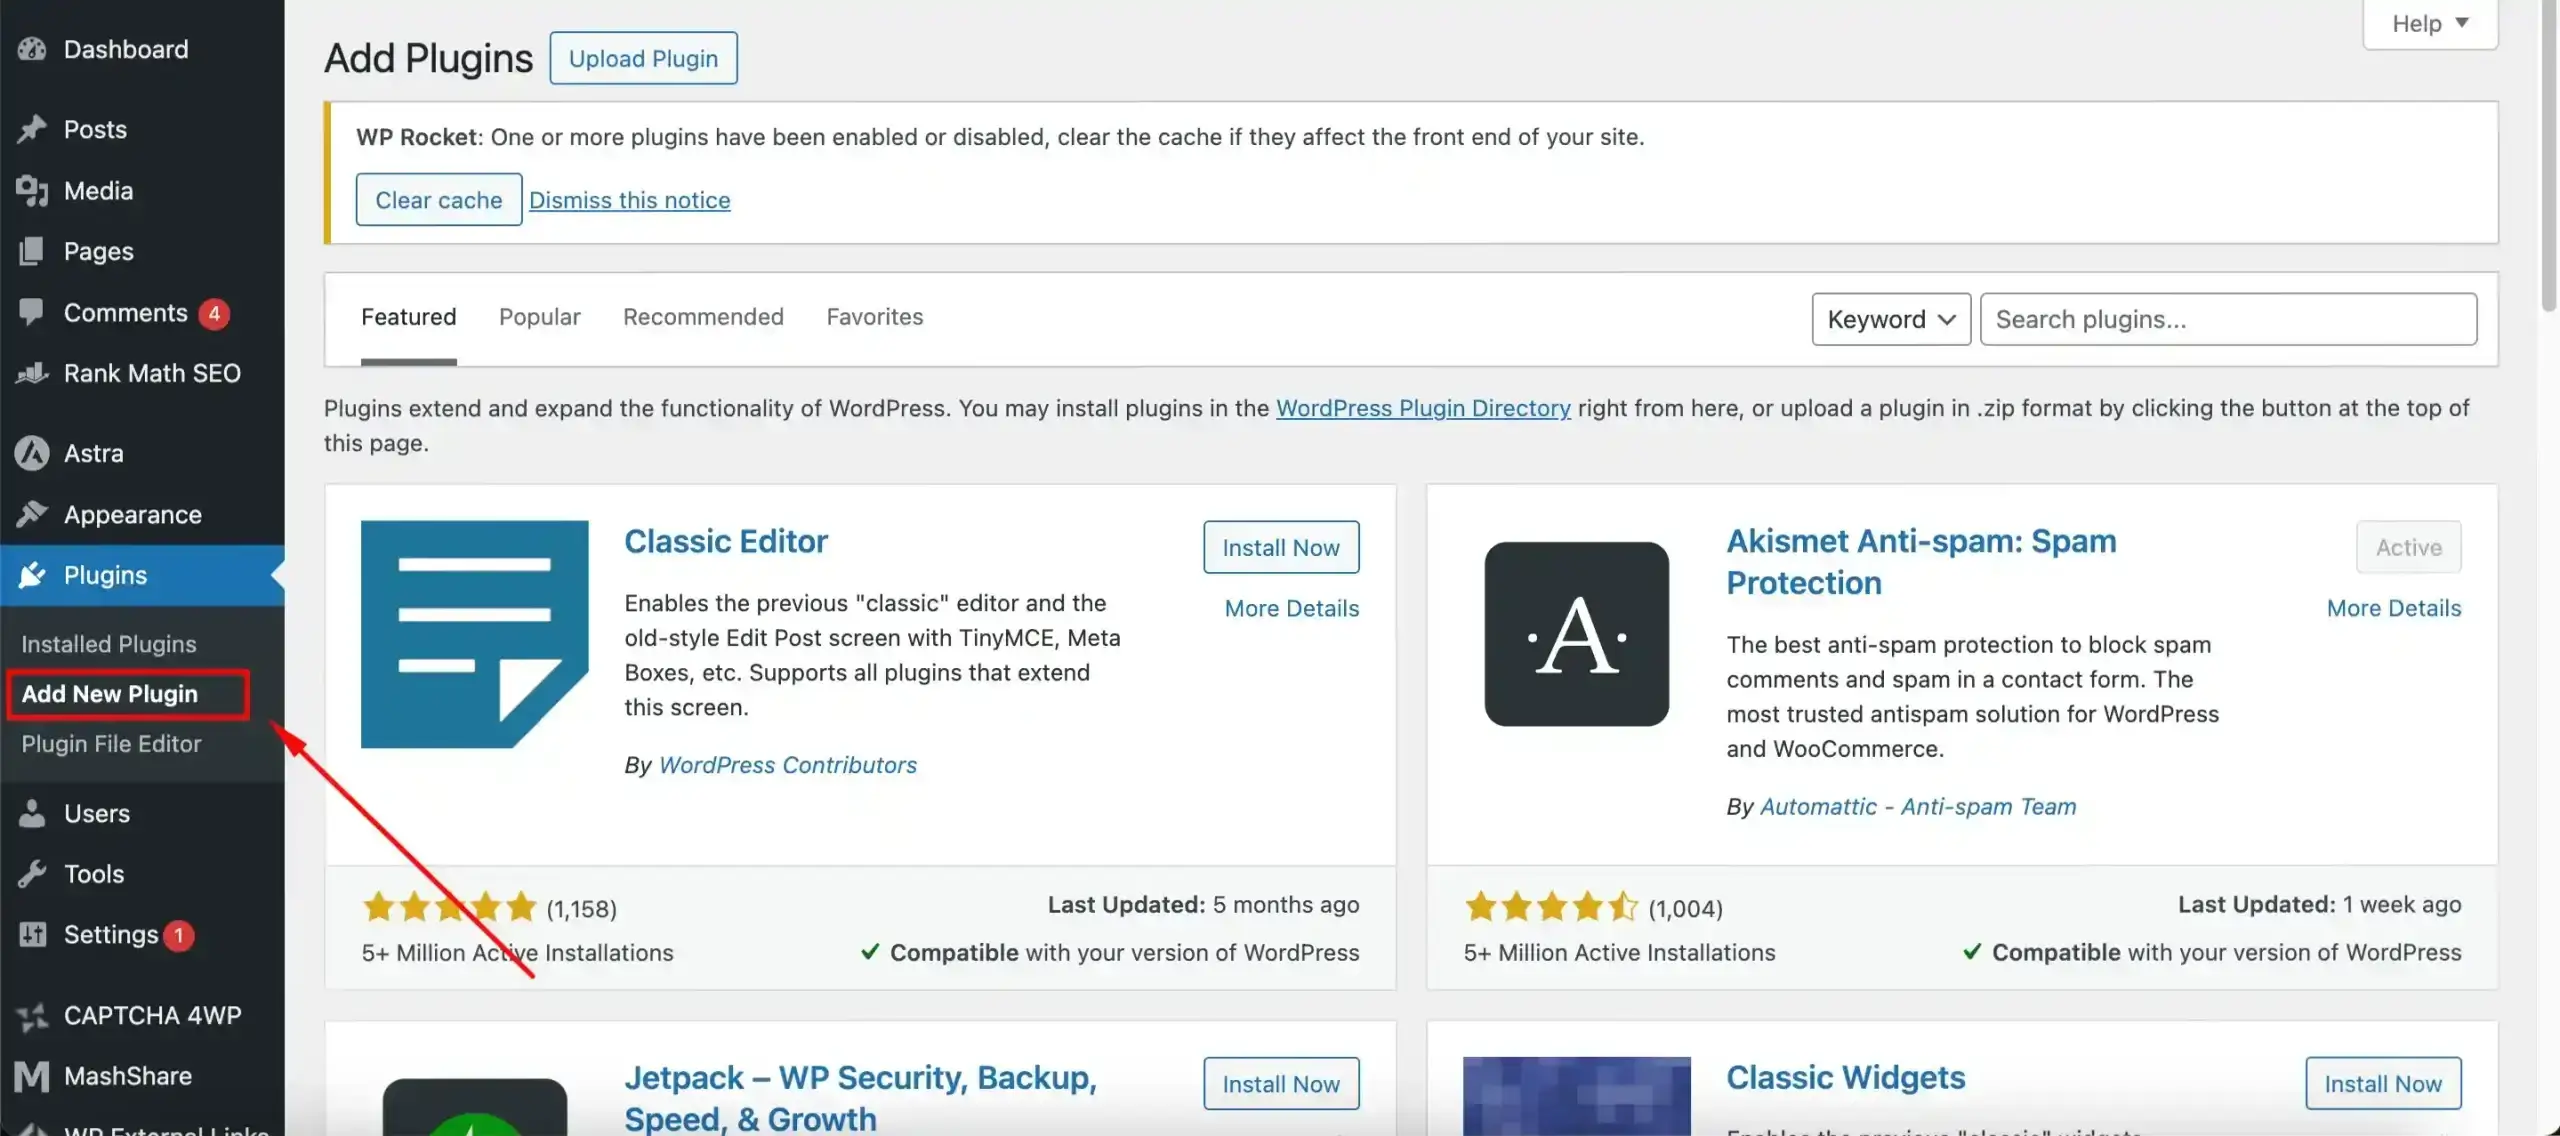
- Go to the WordPress panel and click Plugins>Add New Plugins.
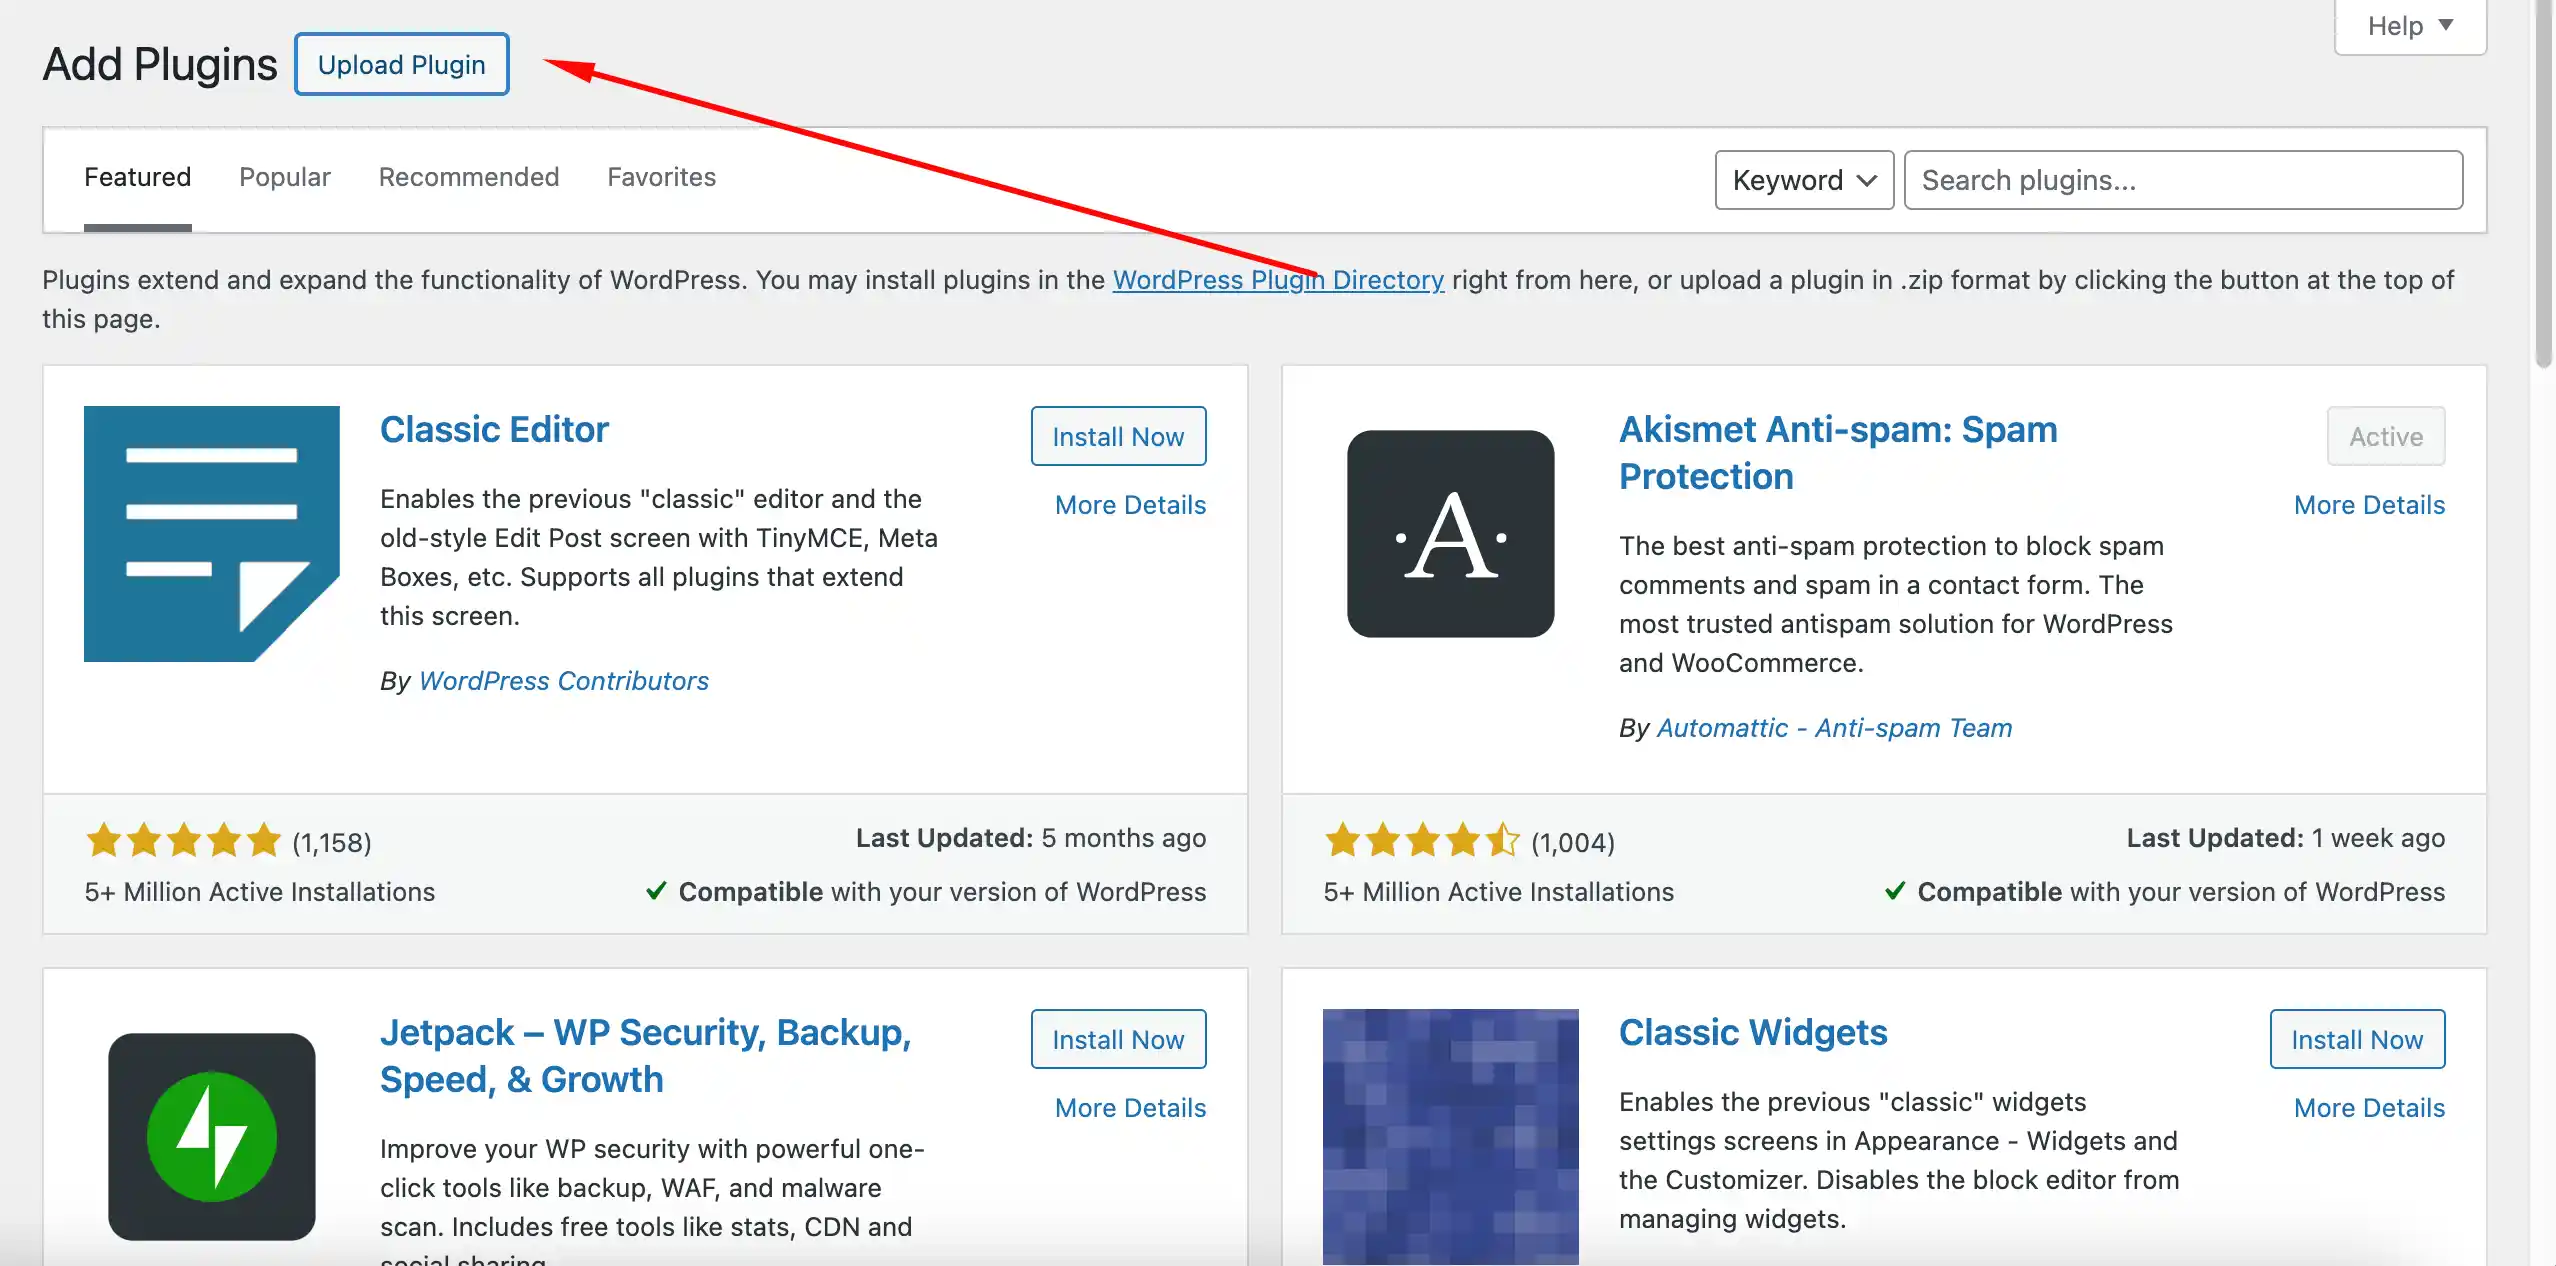
- Click “Upload Plugin” in the top left.
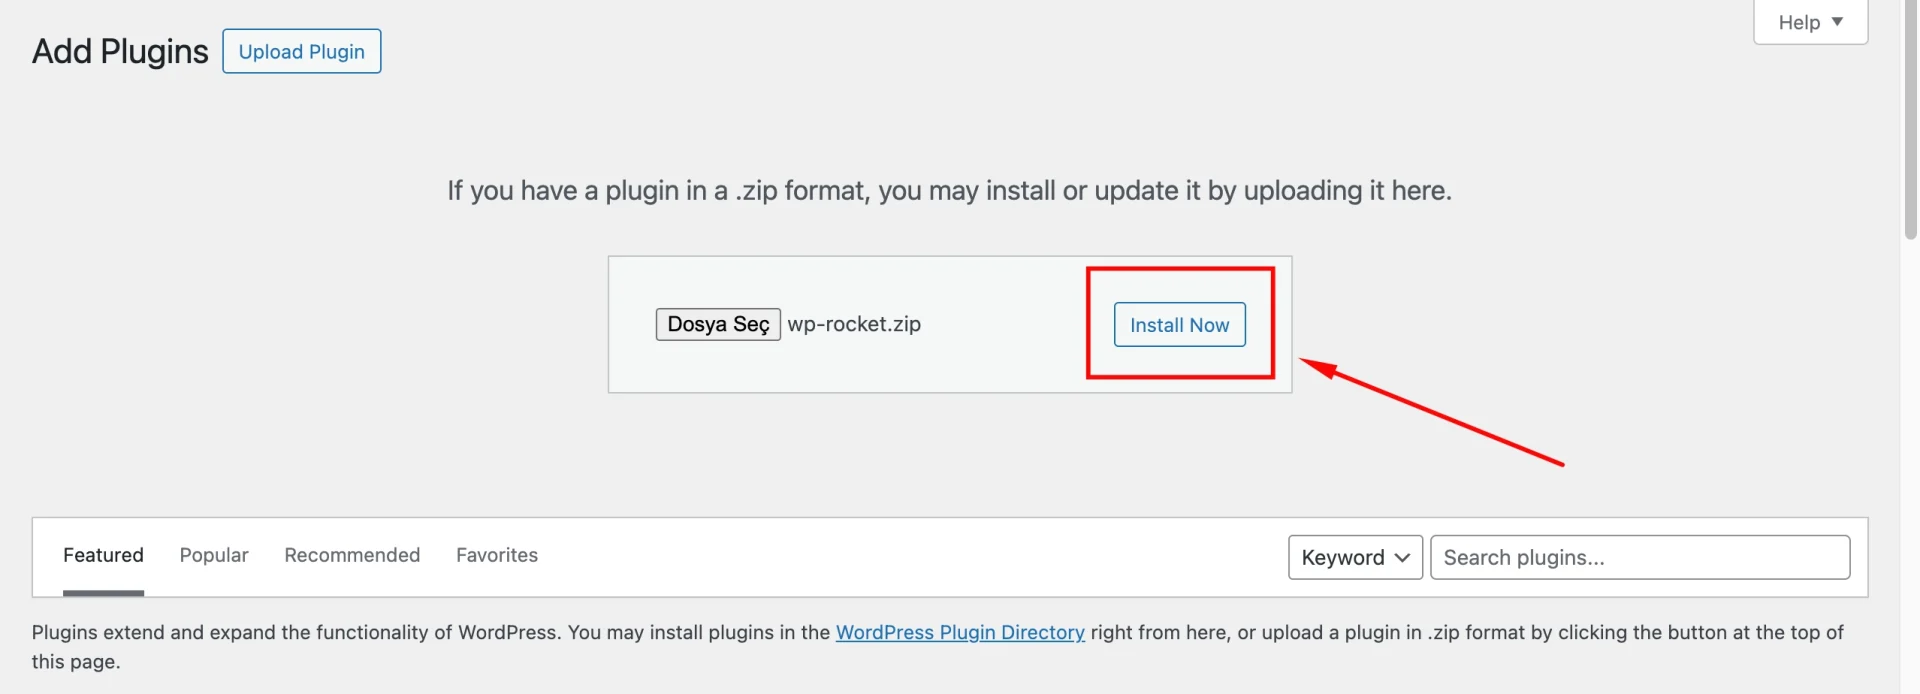
- Select the WP Rocket zip file and click Install Now.

- It should be activated after.
Note: You can find some coupon codes for a discount online.
Installing is not a problem but configuring some WP Rocket settings can be confusing. Here is a basic set up to get the maximum efficiency. Right after you activate the plugin it will start cleaning your cache. But there are some settings you can adjust.
Setting up and configuring:
- Click on WP Rocket on your WordPress dashboard.
- You can use the recommended Basic Options.
- Enable the Lazyload of images and videos especially if you have a lot of pictures etc. on your site.
- You can also enable Mobile Cache to make the plug delete cache for mobile devices.
- If you have a site where users can log in, enable Logged in User Cache.
- You need to enable the SSL Cache button if you have an SSL certificate of your site. (https://)
- If you are not a very experienced WordPress user it is better to leave the Files Optimization section disabled. This section lets you combine Google Fonts if you enable it to make sure to check the site for further errors.
- It also allows you to remove query strings from static resources.
- Minify CSS/JS files
- Combine CSS/JS Files
- Optimize CSS Delivery for these options you need to know which files might cause problems and exclude them. It is better to left all of them disabled if you are a beginner.
- Last but not least, you can adjust your cache lifespan which tells you to clean the cache files every 24 hours or more/less. If you make this setting too short the cache will be deleted too frequently. This might cause visitors to miss your latest content. It Is recommended to set it as 24 hours.
After you completed the setup, you can use a speed test to see how much difference the plugin has made to your website’s load time. You can use Google PageSpeed Insights, Google Test My Site, and Yahoo’s YSlow to see it for yourself.

WP Rocket vs W3 Total Cache
Since WP Rocket is not free, the first thing that comes to mind is to search for free alternatives. The most popular free alternative to WP Rockets is W3 Total Cache. Here is a quick review of them.
We covered the basis of WP Rocket and one thing that catches attention is how easy it is to use the settings. W3 Total Cache is recommended from various sources but it’s not as easy to use as Rocket. So, unless you know your do´s and don’ts it may be a little bit hard for a beginner. But on the other hand, with a very detailed setting section Total Cache offers almost every aspect of the plugin open for customization.
Another difference to talk about is WP Rocket offers Database Optimization while W3 Total Cache doesn’t. Your WordPress database is usually filled with everything you used for your website from themes to posts and all kinds of content. With WP Rocket you can clean your database and optimize it with a variety of settings. Unfortunately, if you have W3 Total Cache you might need another plugin just to do this job.
Yet again a minor but distinctive difference between the two is that WP Rocket has Google Fonts Optimization and W3 Total Cache doesn’t, which helps your Webfont not get in the way of your website loading.
An important feature is that they both have the Content Delivery Network. They both support multiple CDNs while other plugins mainly use only one.
To sum up, in the fundamentals these to plugins do almost the same job, the biggest difference is the usability in them. The decision is yours to make after all.
How to Uninstall WP Rocket?
There may be a possibility of you wanting to change your caching plugin at some point. There are two ways to uninstall your WP Rocket.
Uninstalling Automatically
- You can simply uninstall it from WordPress admin like any other plugin. WP Rocket will clean all of its data automatically.
Uninstalling Manually
- You can also delete it manually from the plugins folder.
- Go to the folder, /wp-content/plugins/.
- Delete the /wp-content/cache/ and /wp-content/wp-rocket-config/ folders
- Delete the /wp-content/advanced-cache.php file
- Edit the htaccess file, remove everything in between #BEGIN WP ROCKET and #END WP ROCKET
- Remove the line define(‘WP_CACHE’, true)
- Delete the wp_rocket_settings entry and the transients and cronjob in the WordPress options table of your database.
Conclusion
In this article, we explained the ups and downs of WordPress Rocket and some other alternatives. Hopefully, we answered all of your questions on the topics of what it is, what does it do, how does it work, and how to set it up.
If you liked this article, please check out our latest articles about SEO. You may be interested in 10 best WordPress plugins for your site.
Frequently Asked Questions About
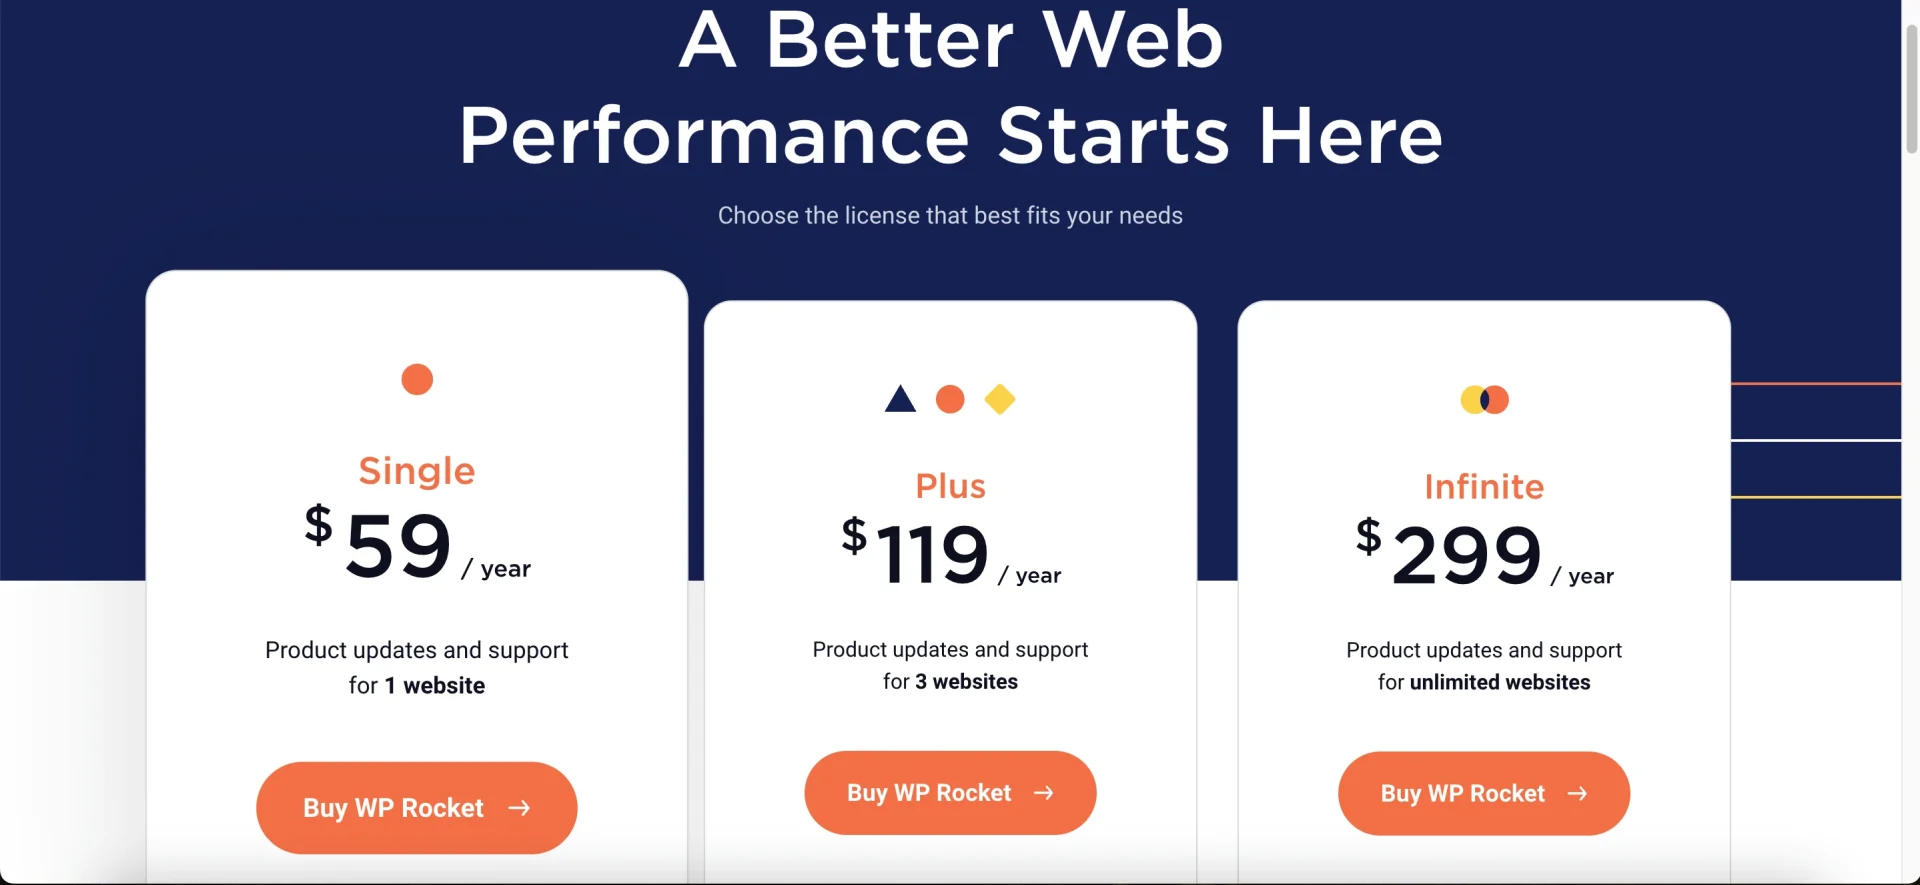
From its websites, you can acquire WP Rocket yearly, for 1 website, 3 websites, or as many websites as you like. All of them offer a one-year subscription.
After a year, your plugin will keep on working but you will not be able to receive any kind of support from the WP support team or update your plugin which may cause problems later.
Of course, WordPress Rocket offers compatibility for each browser just like WordPress itself.


No comments to show.